Sunday, August 4, 2013

RC Planes, an Old "New" Addiction

I started flying RC planes again in November of 2012.  I had attempted as a kid and never had much success.  Back in the early '80s, planes were fast and heavy.  You really had to know what your were doing to keep one in the air.  My dad and I tried in vain to keep a plane in the air, but we met very limited success.  The only plane I had any modicum of success with was a Craftair Piece O' Cake.  It was basically a glider powered by a Cox .049 engine and controlled with a simple two channel radio system.  Even then, I never really did get the hang of it.  There were a couple of other planes, but they were short lived, literally.  Gravity and an inexperienced RC pilot are not a good combination.

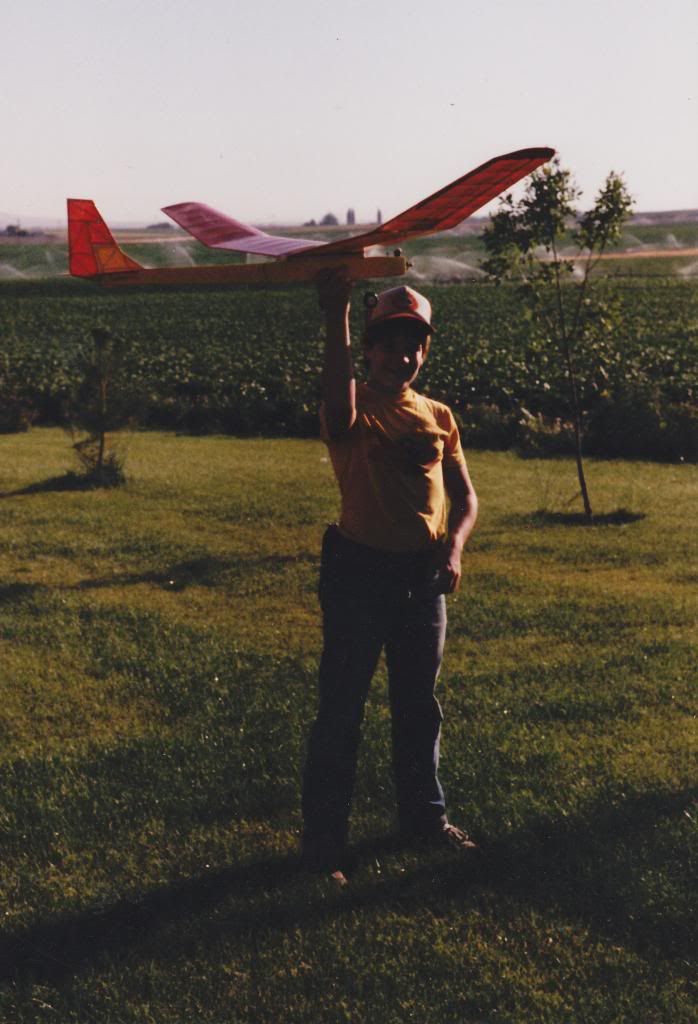
Here's me with the Piece O' Cake.  I think I was 11 or 12 in this picture, maybe 13 at the oldest.


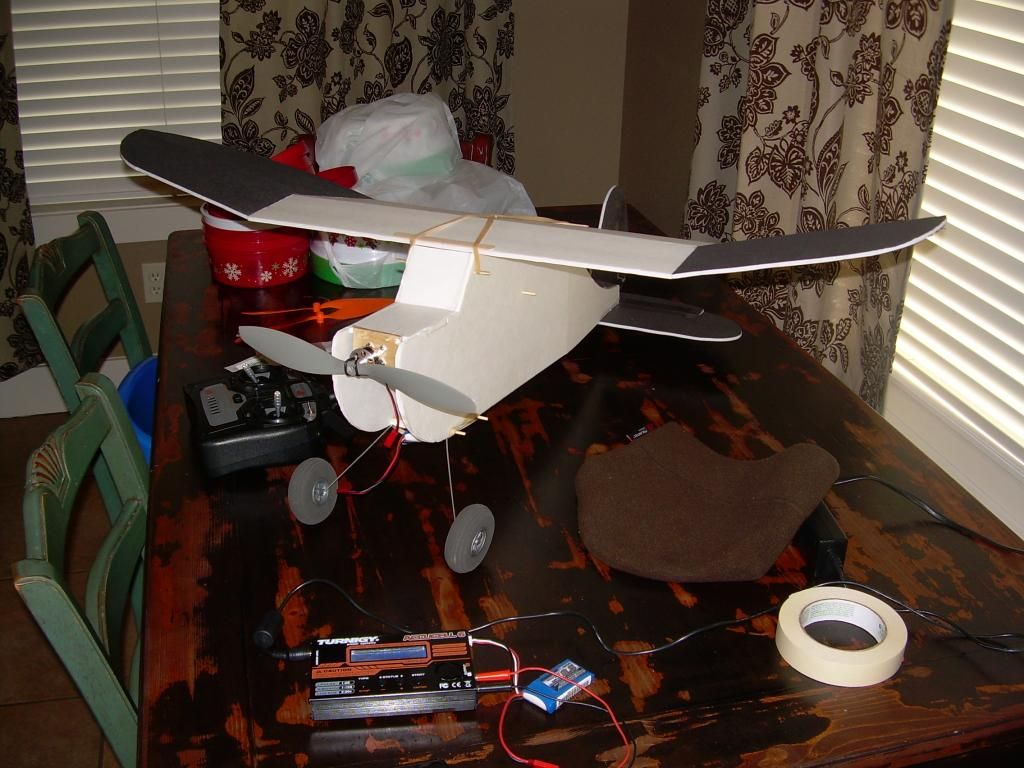
Turn the clock forward almost 30 years and the RC plane bug has bitten me again.  My first attempts were with planes built of Dollar Tree foam board using plans from the internet.  The first plane was a FliteTest Old Fogey.


This was a great plane to start with since it was such a slow gently flying plane.  It was certainly not powerful, but with light wing loading and the polyhedral wing it was stable and gave a beginner like me time to react.  Now Pandora's box was open.

For Christmas my 9 year got an ARES Gamma Pro, and I got a Parkzone T-28 Trojan, as well as a new 6 channel Spektrum Transmitter.  The Gamma was faster than I anticipated, but I was able to fly it and even had Jared fly it on a buddy cord (when two transmitters are linked in a master/slave configuration).  The Gamma gave me the courage to fly my T-28 which actually just hung from the ceiling in the spare bedroom until February-March time frame.  Once I put the T-28 in the air, I was completely hooked!!


I am fortunate to have a very patient and tolerant wife.  In the following months I devoted a LOT of time to RC planes.  I built and bought a dozen or so, most of them made from foam of one sort or another.  The Flite Test planes are particularly fun and really quite inexpensive.

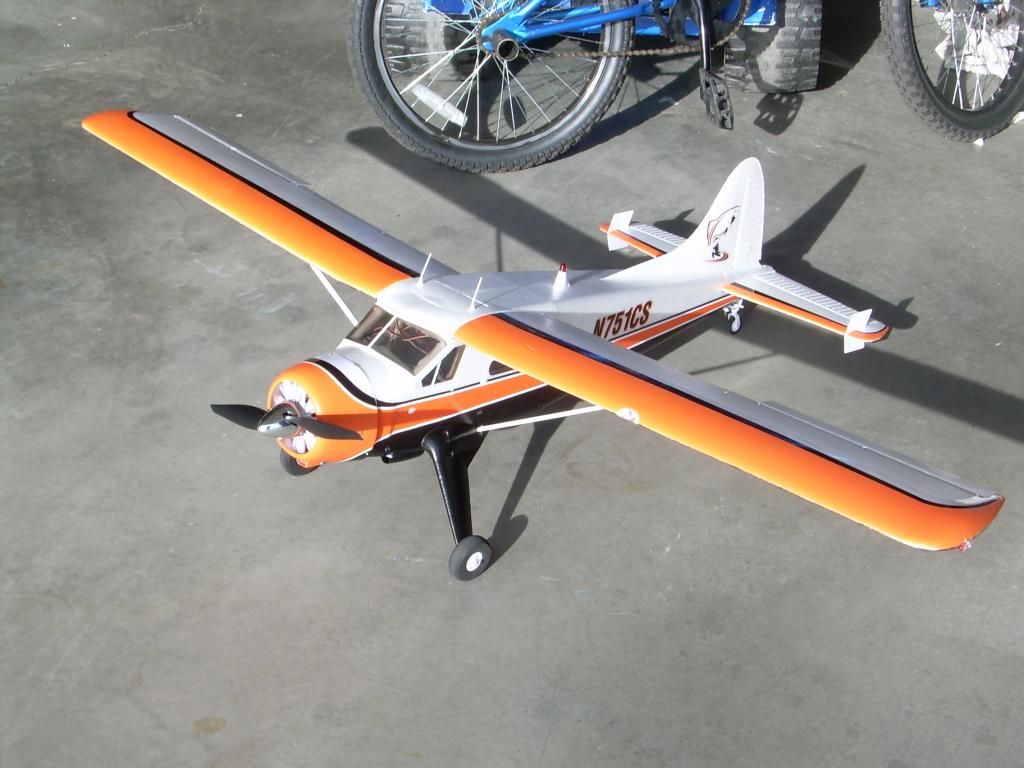
One day while at the RC flying field in rural Hazelton, ID I saw a full scale DHC2 Beaver land at the RC field.  This of course inspired my to get a Beaver of my own.

The landing at the RC field.


My Flyzone Beaver, almost the same color as the one that landed at the RC field!

 
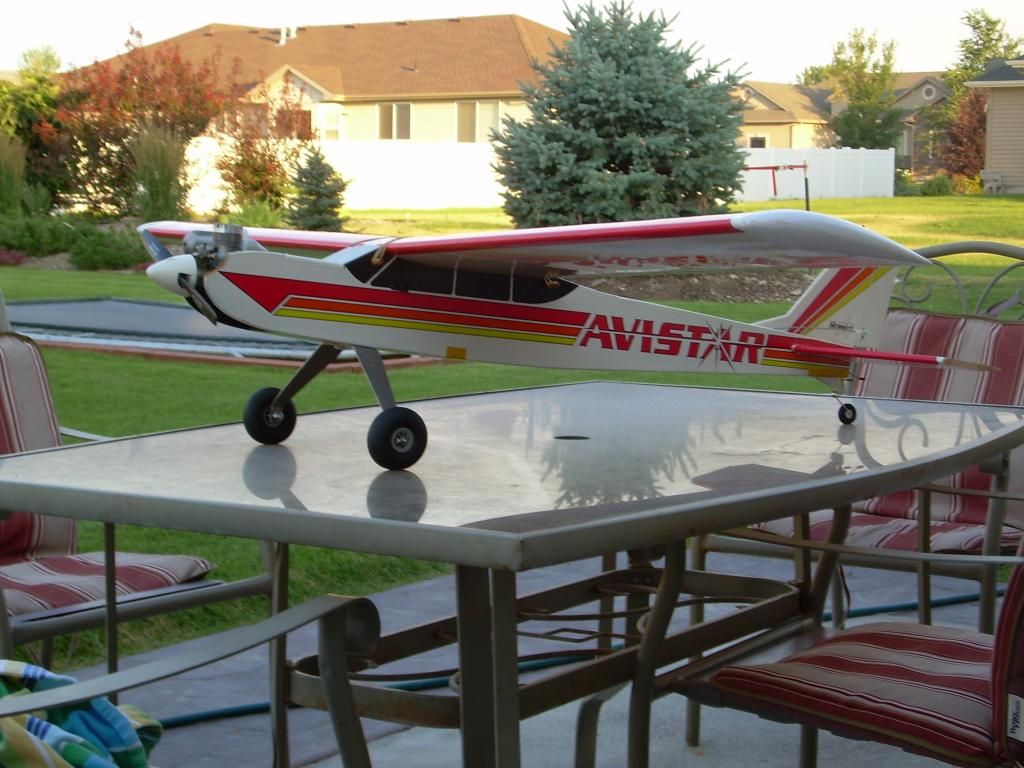
At some point, probably around the time I was building the first Old Fogey, a friend at work gave me an old Hobbico Avistar.  This is a glow powered advanced RC trainer.  It's a step up from the entry level planes in the fact that it has a semi-symmetrical airfoil, making it a bit more aerobatic.

This is the Avistar as I received it.  It had a few bumps and bruises but really wasn't in terrible condition.


Remembering as a kid how much I struggled with a plane very similar to this, I was pretty intimidated by it.  I put it up and really thought I needed to wait to fly it.  I thought I had to be a lot better pilot.  Little did I know, it wasn't actually that hard to fly.  I think it's actually as easy or easier to fly than my T-28.  It was definitely much easier to fly than some of the foam creations I had conjured up!

The first outing to the flying field, with the Avistar, made me realize how much drag it got from the tricycle gear configuration.  Not being one to leave well enough alone, I converted it to a conventional style landing gear, also known as a tail dragger.


It was now much easier to get off the grass runway at the flying field!  Here's a video of my flying the Avistar like I stole it!


It's not the greatest quality, but you get the idea.

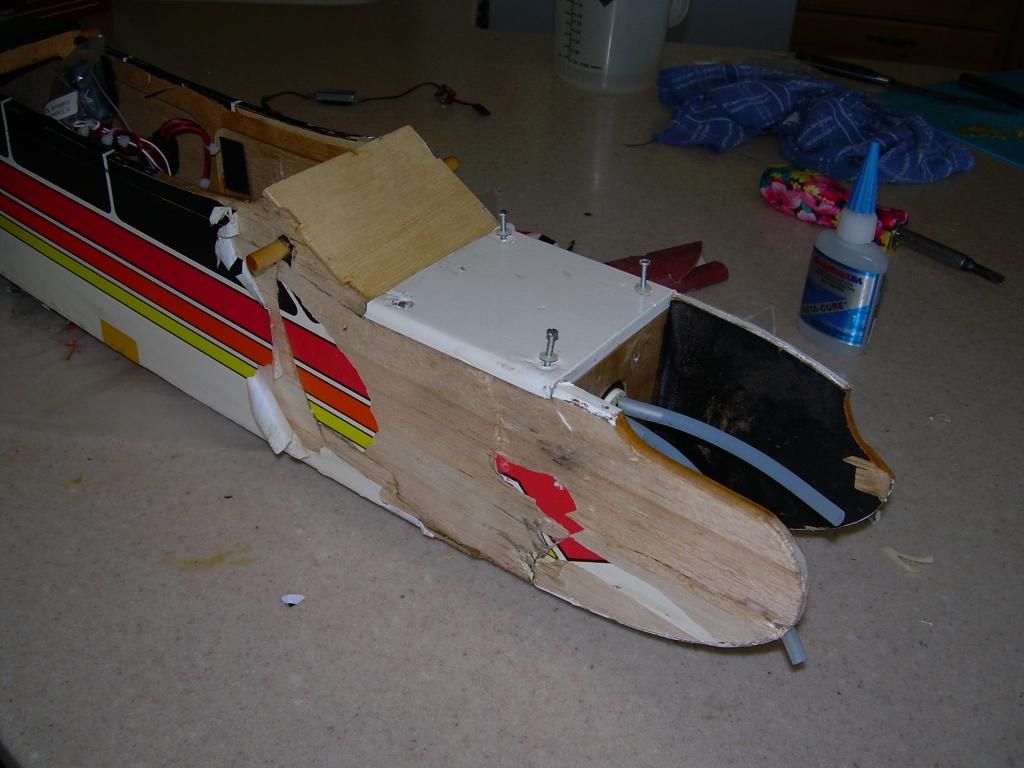
Sadly, just yesterday, the Avistar had a rather hard unintended landing.  During a maneuver known as a stall turn, it appears that the control horn on the elevator suffered a mechanical failure.  Needless to say, a plane without an elevator is doomed.  I didn't have a camera with me at the field, so here's the aftermath....


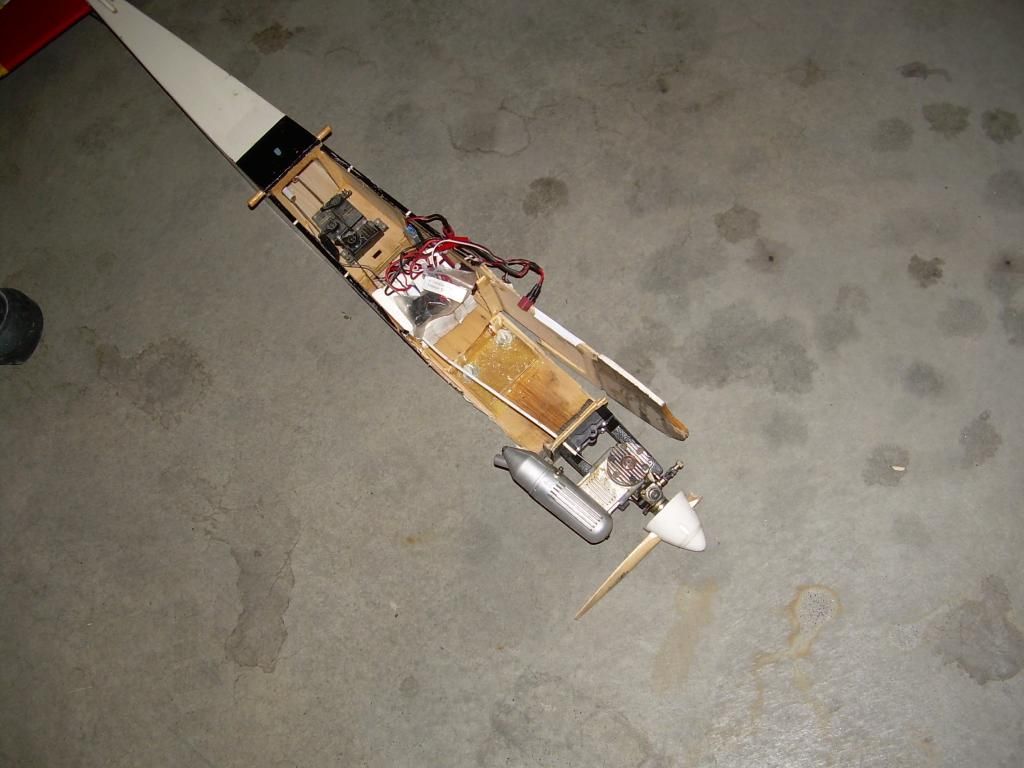
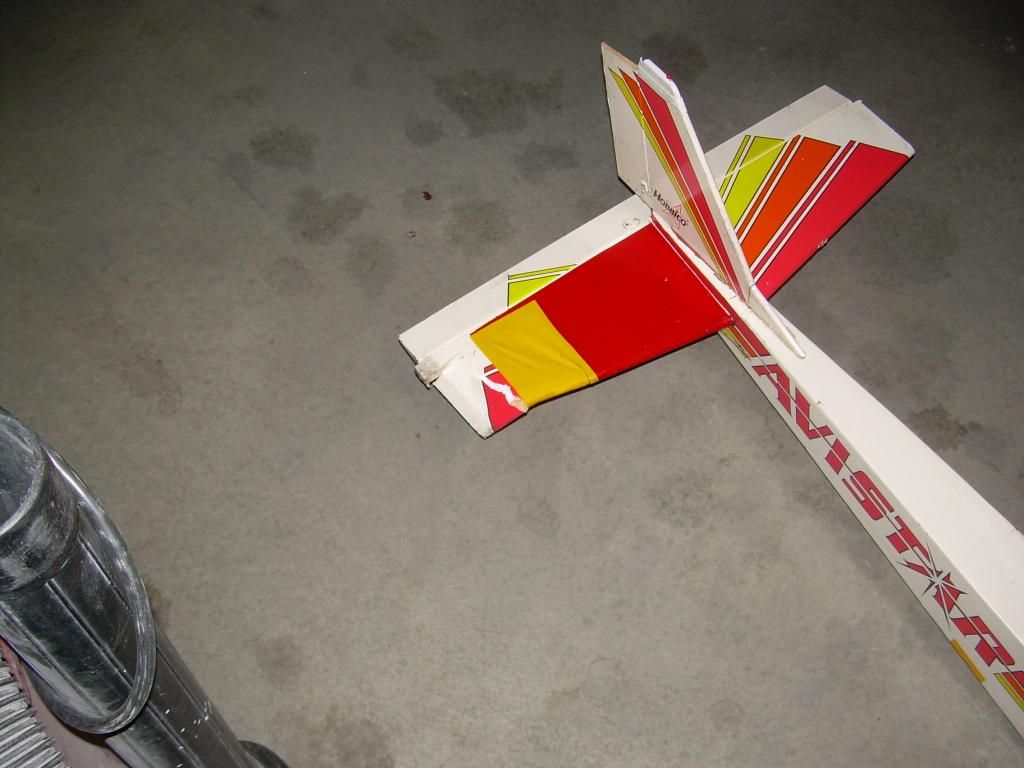
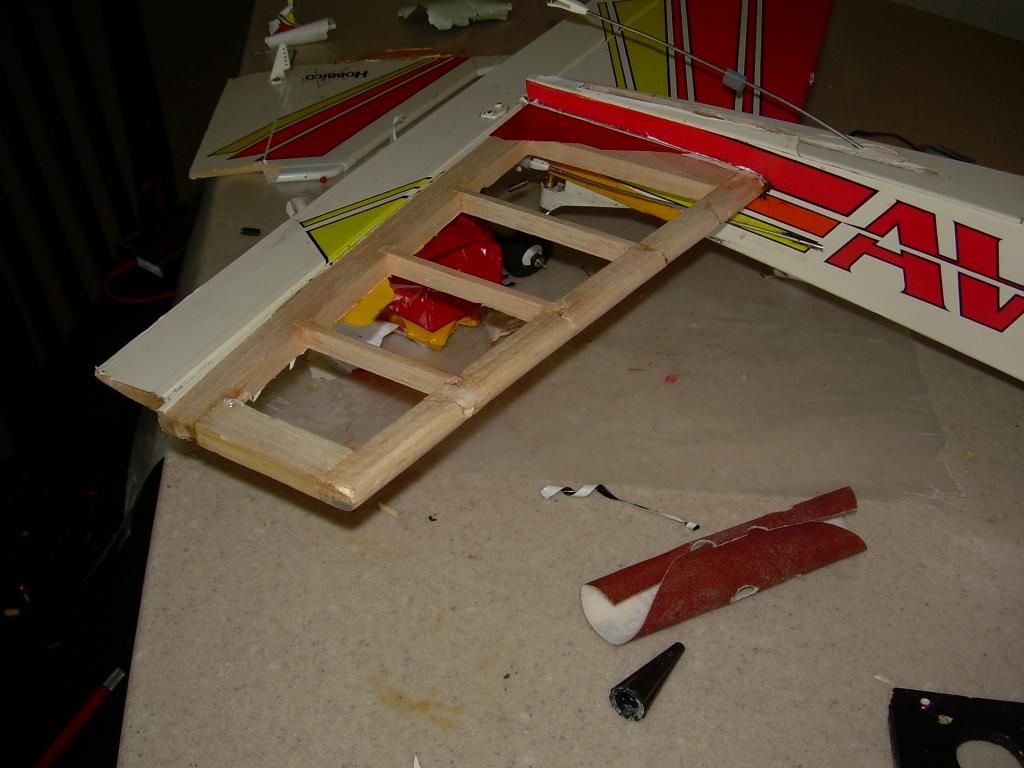
The wing also had some minor damage, but appears to be very repairable.  The front of the fuselage is a different story.  The right hand side (not shown in the picture) took the brunt of the impact, and was shattered into 15 pieces or so....  Not really wanting to spend the money to replace the plane, but really wanting to keep it flying, I decided to try to reconstruct the fuselage.  After a few hours of trial fitting and manipulation, it appeared that it might actually be salvageable.

After gluing the splintered right side back together, but not yet attached to the plane.


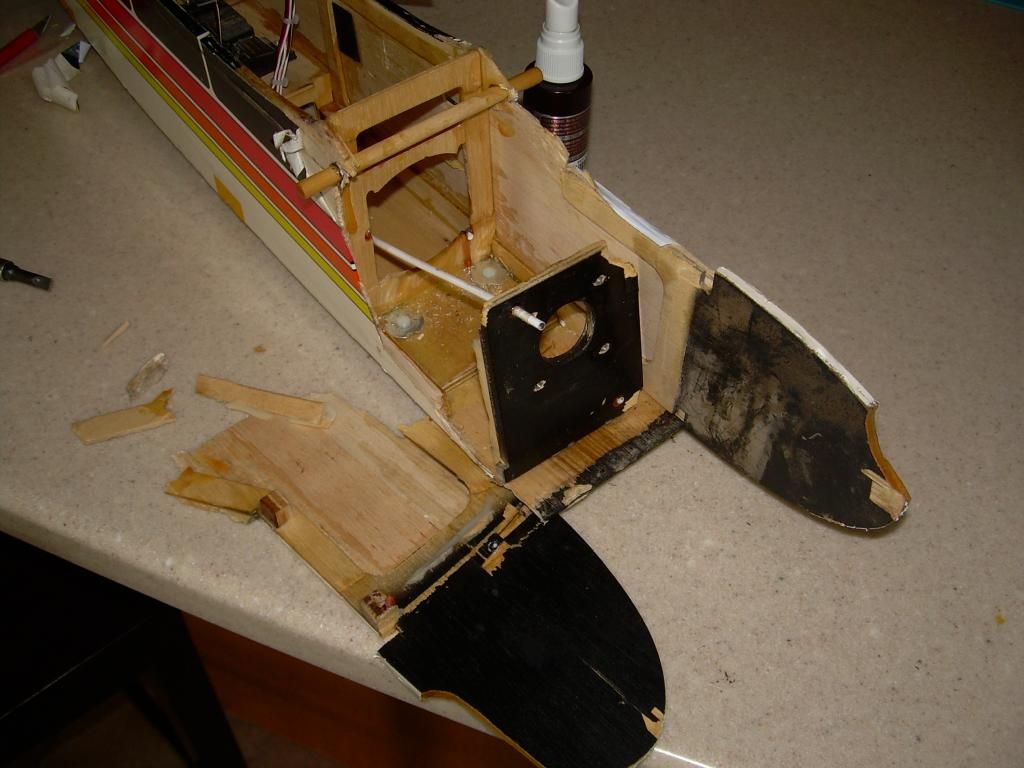
At this point I have glued the bulkhead that holds the rear of the fuel tank back in, and you can see the firewall just set in the fuselage.  I could not find the upper corner of the firewall, so I had to make a new firewall, this is the old one in the above picture.  You can also see that not all of the bits of the fuselage are glued back in place.

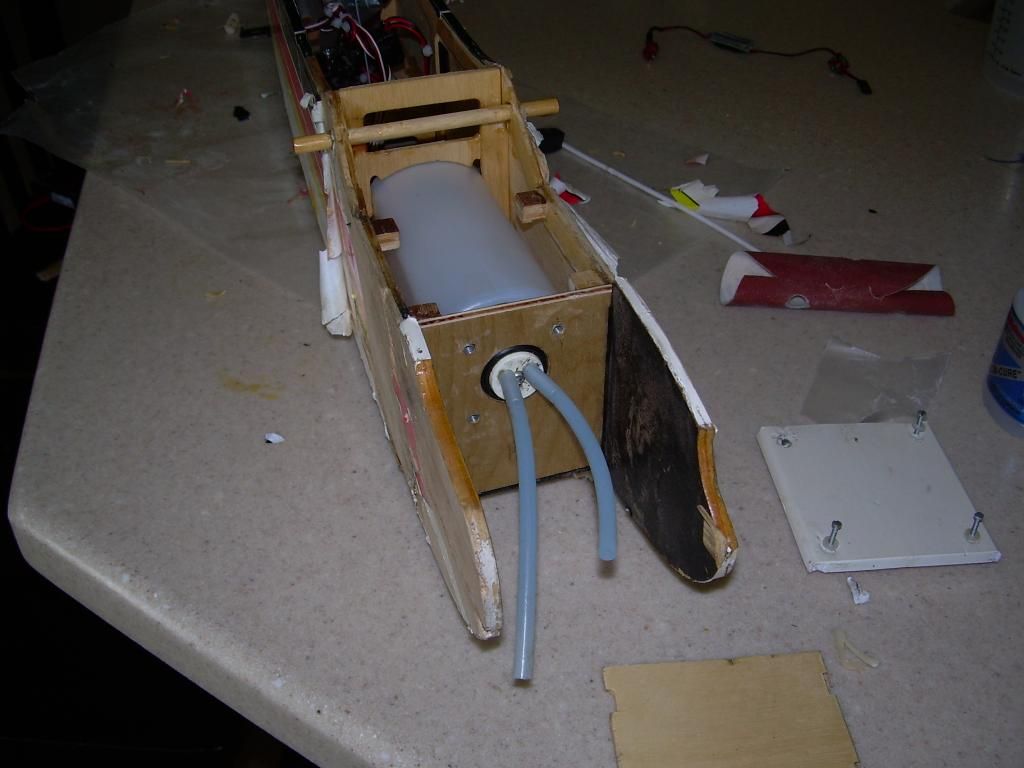
After a little more time and a lot more glue there is some definite progress.  The new firewall is installed and the fuel tank is in place to check how it fits.


Here, the windscreen and the top hatch are mocked up, to see how well they fit.  The alignment looks good, it looks like it is a successful repair!


I also pieced the horizontal stabilizer back together.  Now, I am out of glue and at a point where I need to remove the rest of the covering from the plane.


There is quite a bit of filling and sanding that will have to be done to complete the job, but it definitely looks like it will fly again.  I just can't see throwing a plane in the garbage if it can be fixed.  This one was a bit of a challenge, but definitely salvageable, and for much less money than a new plane.  Stay tuned for updates.  I think I will rename the plane Lazarus, since it is coming back from the dead!!

Tuesday, May 24, 2011

A GMT no Crown Guard Submariner Style Watch

This is the current project...  The watch started life with a case similar to this

Bare Invicta 8926C Case


I am not always good at getting a before picture when I take a watch apart...  This is actually the case from a different watch of the same model.  The watch was a used Invicta 8926 I picked up on ebay.  I wanted to make something that resembled the old Rolex 6542s.  The 6542 has a smaller crown and a bit slimmer case, but for all intents and purposes, this will be a fairly close approximation.  I immediately stripped the watch down and started filing away.  One of the first things that has to go is the obnoxious INVICTA logo in the side of the case.  When they carve in that stupid logo it instantly ruins the look of the watch... at least in my opinion.
After the initial filing, the case looked like this

Crown Guard Removed
Invicta Logo Removed


You will notice there is no obnoxious logo carved into the case side.
DG3804B movement top
3804 Movement Bottom
The movement I will use is a DG3804B.  This is a Chinese made movement with a GMT complication.  It's certainly not as nice as an ETA movement, but it's functional and the price is right.


This is the movement.  I could live without the blued screws and the red winding gear, but it will do what I need it to do.


Fans of James Bond might recall that he wore a similar watch in Goldfinger.  In the opening scene of the movie, Bond checks the time with his lighter, illuminating the non GMT version of the watch, the 6538.

One of the worst parts of building watches is the wait for parts...  Unfortunately, most of the aftermarket watch parts come from Asia, so sometimes the wait can be more than a month.  Plus, I have been building this watch on a budget and really trying to not spend more than $20/week on parts.  If there's something that costs over $20, I just have to wait until I have accumulated the necessary funds.  This technique keeps SWMBO off my back a little!

After more filing and sanding the case now looks like this
It's not entirely evident in the photographs, but finish ended up quite nice.  The final sanding was done with 1200 grit paper and wet sanding.  At this point, I was waiting for a dial, and several other parts to arrive.  The crown in the Invicta was a screw down crown, but unfortunately the threads were a little chewed up on the case tube, making it difficult to screw down the crown (I suspect this is why the original owner sold the watch).  Because of the thread damage, a new crown is definitely in order.  The bezel was also over polished, making the notches around the perimeter dull and not well defined.  At some point I will try to machine a new bezel, but in the mean time, a little file work on the existing bezel will make it slightly more tolerable, as long as the filing doesn't ruin it altogether.  In the photos you can see that the factory crystal is a flat mineral glass crystal.  Everyone knows that a vintage dive watch would of course have to have a plexiglass crystal.  I had a plexi crystal in my parts box that would fit in the case, but won't fit through the bezel insert opening.  I popped it into the case to see how it looks, and in my opinion, it looks GREAT!!!  I can't wait for the new one to arrive, that will fit through the opening.
Domed Plexi Profile
Earlier, I had also assembled the watch with the old Invicta dial, just to get an idea of what it will look like completed.  This is a sign of my impatience...

At this point, I would have started wearing the watch, but the crown is a real issue and has to be replaced, so it was back to waiting for parts to arrive from the Far East...  In it's current condition, it would leak like a sieve...

Finally the dial arrived and it was time to get down to business.  The DG movement, while used in many watches, does not have strong aftermarket support, so I ordered a dial that is intended for a Seiko movement.  This means that the dial feet (little posts that mount the dial to the movement) have to be removed, and new dial feet installed at the proper location for the DG movement.  Once this was complete, I installed the dial and the hands on the movement.
Sterile Submariner Style Dial
Here is the watch with the hands mounted and the dial in place.  At this point, I am back to waiting on parts...
Hands and Dial Installed
The case will need the hole for the crown guard drilled and tapped for the new crown and tube.  The proper size crystal will also need to be installed.  Also, another import part missing is the GMT bezel insert.  Of course, this is going to have to wait... this week's $20 is already spent

Currently in the mail:
new crystal
M3x0.35 tap (for the hole for the crown tube)

Need to Order:
GMT bezel insert

Work to complete:
Drill and tap the hole for the crown tube
Install the new crystal
Install the yet unpurchased bezel insert
Cut the winding stem to fit

Some progress has been made.  In fact, it's entirely done with the exception of new lume and aging the watch a little bit.  All in all, it turned out quite well.  I am pleased with the overall result


Finished Watch     
Here is a shot of the watch before I got the GMT bezel.  It's on one of my homemade leather straps in this photo.

Countdown Bezel on Leather

Watches and Cars, where too much is a good thing....

This blog is about my various projects.  Projects that are certain to irritate SWMBO.  I am a guy with serious champagne tastes and a store brand soda budget...  Since I can't afford the really nice watches, I build watches that resemble really nice watches, but with my own twists.